As a small side project during the build-up to Halloween and whilst I was beginning to warm up and get into the swing of prop making again, I decided to have a go at building my very own Arc Reactor as seen in the first Iron Man movie. In this instance I swapped a cave for the Leeds Hackspace and an MIT Robotics degree with the skills I have acquired from the Loughborough Design School and hastily set to work!
------------------------------------------------------------------------------------------------------------------------------------------------------

------------------------------------------------------------------------------------------------------------------------------------------------------
Sadly no JARVIS to help me out here, and instead I opted to use the Unigraphics NX CAD package to create the model geometry. I chose this package particularly due to the easy nature of performing top-down modelling which was crucial for this project as I had only a few useable reference images to work from.
------------------------------------------------------------------------------------------------------------------------------------------------------

------------------------------------------------------------------------------------------------------------------------------------------------------
This first render was produced solely in Keyshot 5 to illustrate how the separate parts fit together, and how they build up to create the overall shape. The base plate onto which all of the other parts attach to is cored out to receive an array of LEDs and has been designed to hold a small 3V battery internally, removing the need for a separate battery pack.
------------------------------------------------------------------------------------------------------------------------------------------------------

------------------------------------------------------------------------------------------------------------------------------------------------------
This second render was complemented with some Photoshop work to produce a quick and dirty image of what the final concept should look like with the hex bolts and solenoid coils attached.
------------------------------------------------------------------------------------------------------------------------------------------------------

------------------------------------------------------------------------------------------------------------------------------------------------------
Initially, I had planned to use the machining equipment at my Hackspace to produce a fully metal version that would have been more akin to the Arc Reactor that Tony cobbled together himself, however with time running out, and also because 3D printing is ridiculously awesome, I decided to produce an ABS rapid prototype that I could work and finish into the final product.
This also meant that the parts came off the build to an extremely exact tolerance, which created a very pleasant push-fit for the back plate battery covering that you can see at the back of the photo. The clear magnet ring was cast from urethane resin using a small bracelet mould and then turned, machined and polished for a good few hours.
This also meant that the parts came off the build to an extremely exact tolerance, which created a very pleasant push-fit for the back plate battery covering that you can see at the back of the photo. The clear magnet ring was cast from urethane resin using a small bracelet mould and then turned, machined and polished for a good few hours.
------------------------------------------------------------------------------------------------------------------------------------------------------

------------------------------------------------------------------------------------------------------------------------------------------------------
This image shows all of the parts fitted together, without any finishing applied to the white plastic parts. Careful tolerancing at the early CAD stages meant that all of the parts fitted together without the need for glue, which gives the extremely delicate parts a comfortable degree of repairability.
------------------------------------------------------------------------------------------------------------------------------------------------------

------------------------------------------------------------------------------------------------------------------------------------------------------
A few coats of primer, a little sanding, and some metallic car body paint, and all of the white plastic components were completed. Rapid prototype material holds up to sanding and painting remarkably well, and using a few techniques picked up in the LDS model making shop, I was able to give the parts a very convincing metallic appearance.
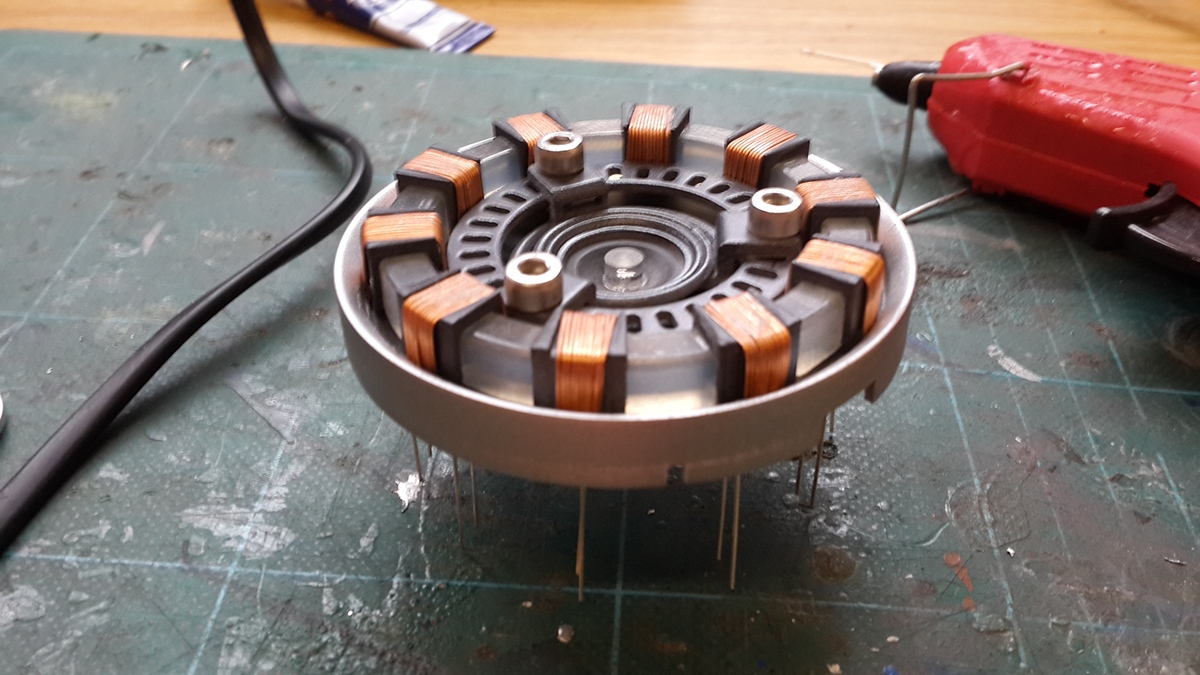
Cutting small lengths of 24AWG coated copper wire and gluing them to the holders created a very nice simulated coil effect. It wasn’t possible for me to fully wrap the wire around the holders, as it was crucial that the super bright white LEDs shone directly to the underneath of the holders, through the transparent ring material. This created the diffused lighting look that I wanted, making it seem as if the entire ring is glowing, rather than 10 isolated spots of light.
Cutting small lengths of 24AWG coated copper wire and gluing them to the holders created a very nice simulated coil effect. It wasn’t possible for me to fully wrap the wire around the holders, as it was crucial that the super bright white LEDs shone directly to the underneath of the holders, through the transparent ring material. This created the diffused lighting look that I wanted, making it seem as if the entire ring is glowing, rather than 10 isolated spots of light.
------------------------------------------------------------------------------------------------------------------------------------------------------
------------------------------------------------------------------------------------------------------------------------------------------------------
A little bit of dremel work was required to bring down the peak of the central LED, after which some car body repair mesh was glued to the central cone, and a few M5 hex bolts were added. At this point you can see that the piece is standing on the LEDs' legs, however these were promptly trimmed down, soldered up and connected in parallel to a micro switch and the flat 3V battery.
A bit of weathering here and there and a few little touch ups and it was ready to go! The flat design without a separate battery pack means that using some velrco and on old shirt, a very simple setup can be employed to allow the prop to be worn for exended periods of time. The internal bettery life will last for almost 3 days of being on constantly, which is more than enough for your average Halloween party.
A bit of weathering here and there and a few little touch ups and it was ready to go! The flat design without a separate battery pack means that using some velrco and on old shirt, a very simple setup can be employed to allow the prop to be worn for exended periods of time. The internal bettery life will last for almost 3 days of being on constantly, which is more than enough for your average Halloween party.
------------------------------------------------------------------------------------------------------------------------------------------------------

------------------------------------------------------------------------------------------------------------------------------------------------------
Here you can see the final thing in operation! I am extremely pleased with the intensity of the LEDs and with the way in which they are diffused across the entire magnet ring. This project was an extremely enjoyable build and it was the core of many a conversation at the Halloween parties that I attended! Unfortunately a tumble down some stairs caused one of the magnet rings to become damaged along the top left, however this will be fixed in due course once I have some more free time.
------------------------------------------------------------------------------------------------------------------------------------------------------
------------------------------------------------------------------------------------------------------------------------------------------------------
Thank you for reading and apologies for the long project and extensive use of text! I prefer to avoid the TV chef approach of 'here's one I made earier', as with projects like this it's often the details along the way that really make them special.

